HTML 공부한 내용을 바탕으로 Google 홈페이지를 따라 만들어보겠다.
에디터는 Visual Studio Code를 사용했다.

<!DOCTYPE html>부터 시작~!
HTML 개발환경 세팅을 위해 vscode에서 확장 프로그램 두 가지를 설치했다.
1. open in browser : html 파일을 브라우저에서 열 수 있게 하는 프로그램

html 파일에서 마우스 오른쪽 버튼 -> Open in Browser 클릭!
2. Live HTML Previwer : 실시간으로 html 미리보기를 제공한다.
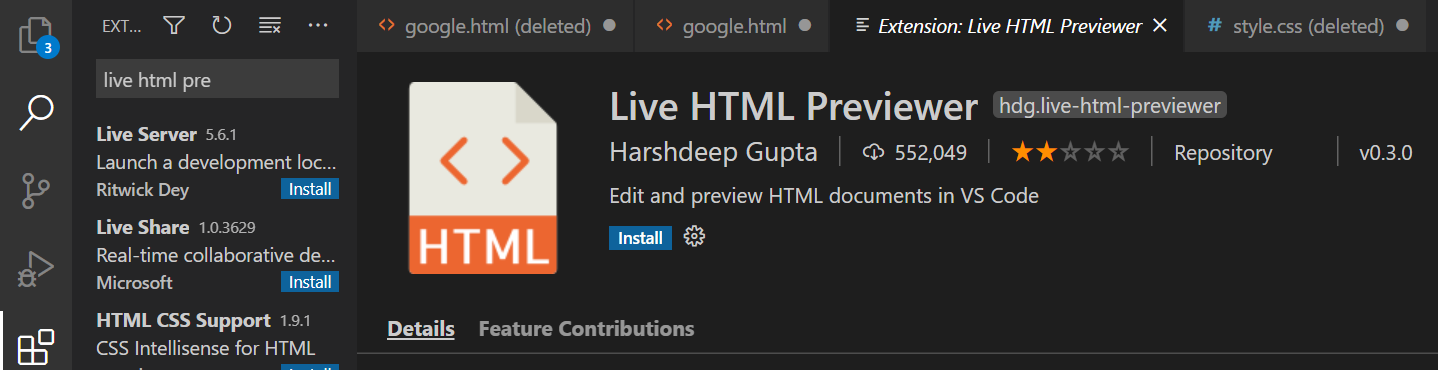
F1눌러서 'show live server preview'치면 오른쪽에 분할된 창이 생겨 실시간 미리보기가 제공된다.
먼저 내 작업폴더(Project)밑에 프로젝트파일(GoogleProject)를 하나 만들고 그 밑에 html, css, images 폴더를 하나씩 만들었다.
C:
|----Project
|----GoogleProject
|----html
|----google.html
|----css
|----style.css
|----images
먼저 구역을 나누어 위쪽부터
<div class="header">
<div class="content">
<div class="footer">
로 구역을 구분했다.
1. <div class="header"> 영역

<div class="header">
	<div class="menu"><a href="#">Gmail</a></div>
    <div class="menu"><a href="#">이미지</a></div>
    <div class="menu"><img src="../images/cube.png"/></div>
    <div class="menu"><img src="../images/circle.png"/></div>
</div>
↑header영역 html
/* header */
.header {
float:right;
display:block;
}
.hcontent {
vertical-align: middle;
position:static;
padding:15px;
display:inline-block;
}
.hcontent img {width:25px;}
a:link {
color:#444444;
text-decoration: none;
}
a:visited {
color: #444444;
text-decoration: none;
}
a:hover {
color: #444444;
text-decoration: none;
}
↑header영역 css
html에 css를 연결하는 방법에는 총 세 가지가 있다.
1. 요소에 style 어트리뷰트로 스타일 속성 지정하기
2. header영역에 <style>태그에서 속성 지정하기
3. 외부 css파일 연결하기(link태그 이용)
HTML문서에 CSS를 적용하는 3가지 방법 → euncoding.tistory.com/8
HTML에 CSS를 적용하는 3가지 방법
1. HTML문서 안에서 CSS를 적용할 태그 내에 입력하기(inline style sheet) 2. HTML 문서 안에서 빨간 테두리가 있는 박스를 만들고싶다! 1번 방법보다 비교적 코드가 잘 정돈되고 문서 내에서 재사용이 가
euncoding.tistory.com
나는 3번 방식을 이용했는데 오늘 프로젝트와 같은 간단한 웹페이지를 만들 때는 2번 방식을 이용해도 괜찮을 것 같다.
2. <div class="content">영역

맨 처음 막혔던 부분은 이미지 삽입이었다. 나는 images폴더를 만들고 그 안에 필요한 모든 이미지파일을 넣어 상대경로참조로 가져왔다.
img파일 위치에 따른 경로 지정 방법(절대주소, 상대주소)
나는 분!명!히! 책에서 배운대로 경로를 잘 설정했다고 생각했는데 이미지파일이 자꾸 엑박?으로 나왔다...
알고보니까 수정된 코드가 적용이 안되고있는 상태였다.
이미지파일이 깨져서 나오는 경우(엑박이 뜨는 경우), 수정한 코드가 저장된 상태인지 확인하자...!
분명히 몇 번 Run을 돌렸는데도 새로 수정한 코드가 적용되지 않고 있었다. 아무리 봐도 틀린 곳이 없어 잠깐 멘붕이었다 ㅎㅎ
(예전에는 파일의 대소문자를 틀려서 몇 시간 헤맨 적이 있었다! 다음부터는 그러지말자^^)
※ 오늘 가장 오래 삽질했던 부분은 구글 로고 가운데정렬이었다.
이미지를 가운데 정렬하는 방법은
1. img태그를 둘러싼 <div>를 만들거나, 부모요소가 이미 있다면 부모요소에 text-align:center;을 주는 방법
2. 이미지의 display:block;으로 주고 margin:0px auto;로 주는 방법
이 있다.
먼저 1번 방법을 사용해보았다.

로고가 무언가를 기준으로 가운데정렬이 되었지만 화면의 정가운데가 아니었다.
이유는 그 전에 작성한 <div class="header">영역에 float:right;가 적용되어있었기 때문이었다. 이 영역이 인라인요소인 <div class="contents">영역의 오른쪽 일부를 차지하고 있었기 때문이다.
<div class="header">영역이 페이지의 너비 전체를 차지하게 하면서도 float으로 오른쪽 정렬을 해주고싶었다.
그래서 width:100%;를 적용해보고 display:block;로도 적용해보았지만 두 경우 모두 float속성을 사용할 수 없게 되기 때문에 이 방법은 사용할 수 없었다.
(float속성은 display가 inline인 경우에 특정 방향으로 둥둥 떠서 달라붙게 하는 속성이다.)
★ float속성을 통해 부유속성 지정시 display는 무시된다.
★ width:100%; 로 지정하게 되면 양옆으로 '부유'하지 못하게 되므로 float속성을 지정할 수 없다.
즉, float속성을 가진 요소는 해당 너비 전체를 차지할 수 없다.
그 다음 2번 방법을 사용해 보려했지만 위와 같은 이유로 로고이미지의 display를 block으로 변경할 수 없었다.
그래서 사용한 방법은
.logo {
width:400px;
margin:0px auto;
}
#logoImg {
padding-top:100px;
width:400px;
}
이렇게 부모요소와 이미지의 width를 같게 맞춰주고 부모의 margin: auto;로 적용해주는 것이다.

부모요소의 margin:auto; 로 지정해 화면의 가운데에 오게 했고 이 과정에서 <div class="header">는 영향을 미치지 않는다! 그런 요소의 너비를 로고의 너비와 같게 해주면 로고를 화면에 정가운데에 오게 할 수 있게 된다.
3. <div class="footer">
또 많이 고민했던 부분은 푸터에서 양쪽으로 정렬하는 부분!

<div class="footer">
<p> 대한민국</p>
<hr>
<div class="f_left">
<div class="fcontent"><a href="#">광고</a></div>
<div class="fcontent"><a href="#">비즈니스</a></div>
<div class="fcontent"><a href="#">Google 정보</a></div>
<div class="fcontent"><a href="#">검색의 원리</a></div>
</div>
<div class="f_right">
<div class="fcontent"><a href="#">개인정보처리방침</a></div>
<div class="fcontent"><a href="#">약관</a></div>
<div class="fcontent"><a href="#">설정</a></div>
</div>
</div>↑footer영역 html
.f_left{
text-align:left;
display:inline-block;
width:50%;
}
.f_right{
text-align:right;
float:right;
width:50%;
}
↑ footer영역 css
완성!!!!

html코드
Google.html
<!DOCTYPE html>
<html>
<head>
<title>구글홈페이지 따라잡기</title>
<link rel="stylesheet" href="css/style.css"/>
</head>
<body>
<div class="header">
<div class="hcontent"><a href="#">Gmail</a></div>
<div class="hcontent"><a href="#">이미지</a></div>
<div class="hcontent"><img src="../images/cube.png"/></div>
<div class="hcontent"><img src="../images/circle.png"/></div>
</div>
<div class="content">
<div class="logo">
<img id="logoImg" src="../images/logo.jpg"/>
</div>
<div class="search">
<img id="searchIcon" src="../images/search.png"/>
<input type="text">
<div class="rightIcon">
<img id="keyboardIcon" src="../images/keyboard.png">
<img id="recorderIcon" src="../images/recorder.png">
</div>
</div>
<div class="button">
<button type="button">
Google검색
</button>
<button type="button">
I'm feeling lucky
</button>
</div>
</div>
<div class="footer">
<p> 대한민국</p>
<hr>
<div class="f_left">
<div class="fcontent"><a href="#">광고</a></div>
<div class="fcontent"><a href="#">비즈니스</a></div>
<div class="fcontent"><a href="#">Google 정보</a></div>
<div class="fcontent"><a href="#">검색의 원리</a></div>
</div>
<div class="f_right">
<div class="fcontent"><a href="#">개인정보처리방침</a></div>
<div class="fcontent"><a href="#">약관</a></div>
<div class="fcontent"><a href="#">설정</a></div>
</div>
</div>
</body>
</html>
css코드
style.css
/* header */
.header {
    float:right;
    display:block;
}
    .hcontent {
    vertical-align: middle;
    position:static;
    padding:15px;
    display:inline-block;
}
.hcontent img {width:25px;}
a:link {
    color:#444444;
    text-decoration: none;
}
a:visited {
    color: #444444;
    text-decoration: none;
}
a:hover {
    color: #444444;
    text-decoration: none;
}

/* content */
.content {
    padding-bottom:100px;
}
.logo {
        width:400px;
        margin:0px auto;
}
#logoImg {
        padding-top:100px;
        width:400px;
}
div.search {
    margin: 0 auto;
    line-height:50px;
    width: 700px;
    height:50px;
    border :0.2px solid gray;
    border-radius:25px;
}
#searchIcon {
    width:30px;
    margin-top:10px;
    margin-left:10px;
}
div.search input {
        border:none;
        width:500px;
        height:30px;
        position: relative;
        bottom:10px;
}
.rightIcon {
    float:right;
}
.icon {
    width:30px;
}
#keyboardIcon {
    width:30px;
    margin-top: 10px;
    margin-right: 10px;
}
#recorderIcon {
    width:30px;
    margin-top: 10px;
    margin-right: 10px;
}
.button {
        display:flex;
        justify-content:center;
        width:100%;
        /* margin:0px auto; */
}
.button button {
    border-radius:10px;
    border:none;
    margin:10px;
    width:150px;
    height:50px;
}

/* footer */
div.footer{
    background:#eeeeee;
    border-top:0.1px solid gray;
    height:100px;

}
div.footer hr {
    height:0.5px;
    border:none;
    background-color:grey;
}
.fcontent{
    margin:10px;
    vertical-align: middle;
    position:static;
    display:inline-block;
}
.footer a {
    color:#777777;
}
.f_right{
    text-align:right;
    float:right;
    width:50%;
}
.f_left{
    text-align:left;
    display:inline-block;
    width:50%;
}

'Programming' 카테고리의 다른 글
| [HTML] section태그와 article 태그의 차이점 (0) | 2021.02.16 |
|---|---|
| [CSS] HTML에 CSS를 적용하는 3가지 방법 (0) | 2021.02.10 |
| 마크다운이란? 마크다운 문법 / 사용법 총 정리 (0) | 2021.02.04 |
| [HTML] 시멘틱 마크업 (0) | 2021.02.03 |
| [HTML] HTML의 기본 문법 (0) | 2021.02.03 |


